logo
OctoForms
articleName

Tutorial: Using the Appointment Manager for Your Business

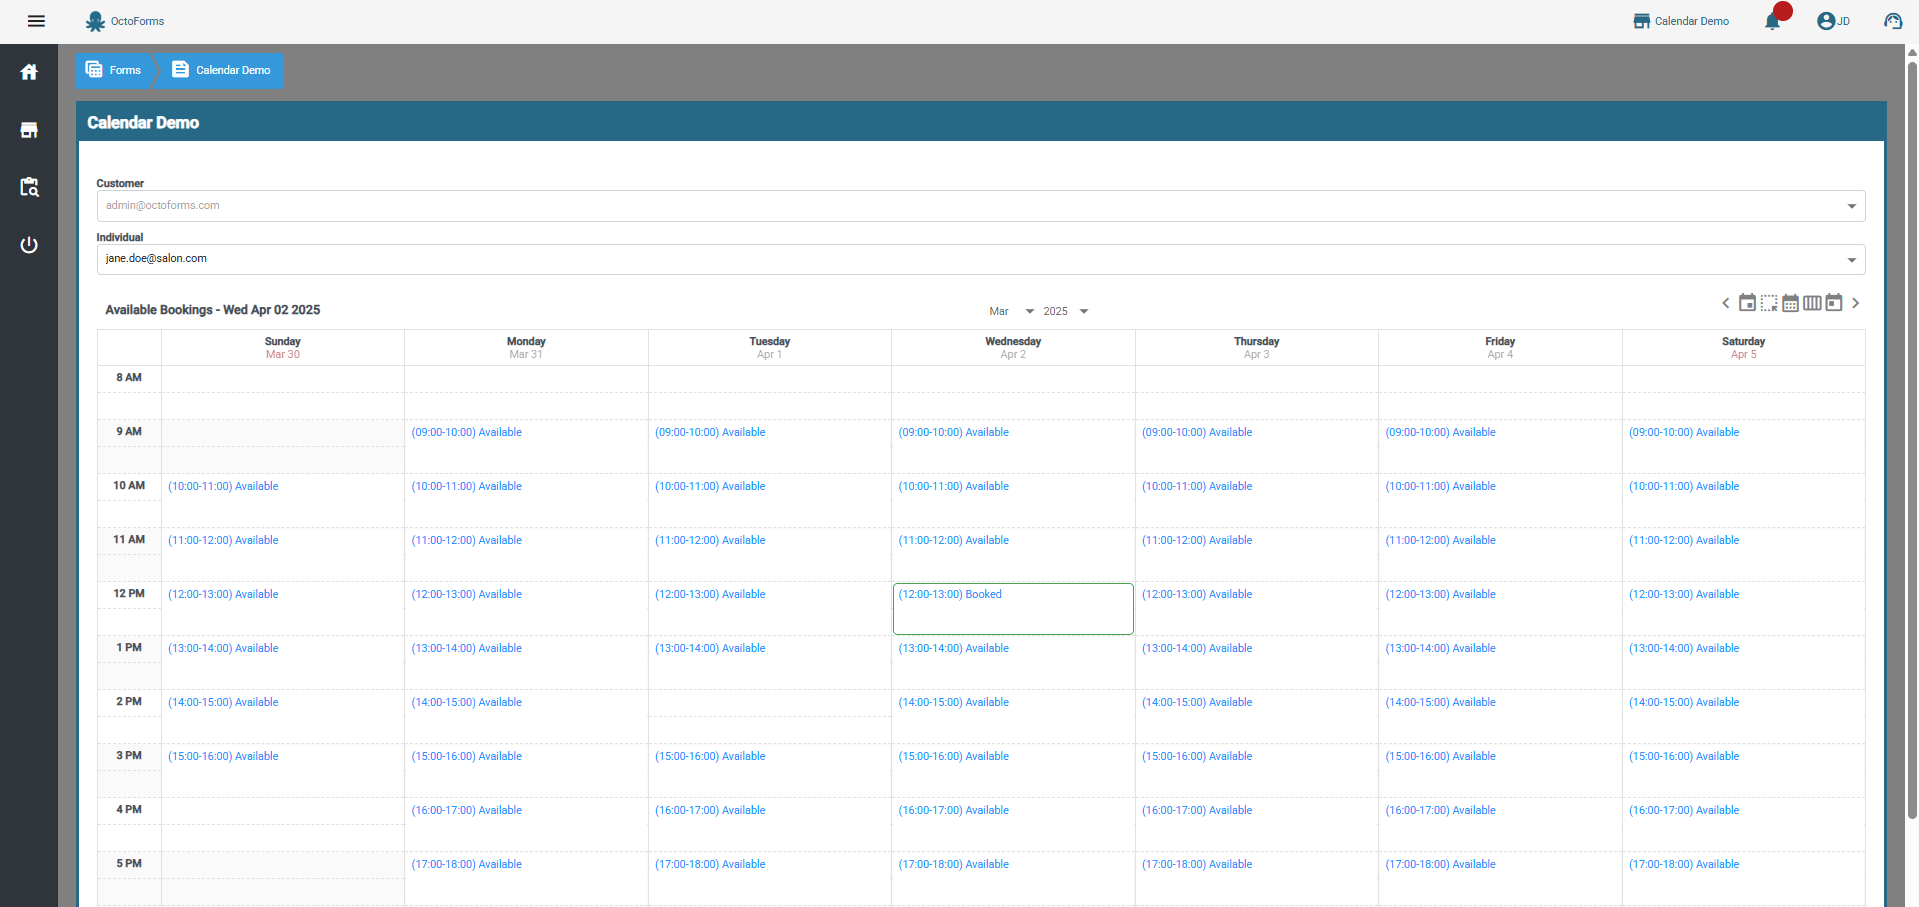
Welcome to this step-by-step tutorial on how to effectively use the Appointment Manager for your business. The Appointment Manager is a dynamic form builder equipped with a calendar selection control

Industries

Our Calendar control is versatile for many industries such as:

Hair parlors Tattoo parlors
Grooming services Photography bookings
Tutor bookings Tailor bookings
Coaching bookings Paint services
Decoration services Catering services
Training Freelance services
Assistant and consulting services

Getting Started

Step 1: Access the Appointment Manager

  • Register and/or Login with Octoforms.
  • On first Login and Setup of Company you will reach the Default Templates screen or navigate to Default Templates and select the Booking Template.
Step 2 (Optional): Rename Booking Control for Display purposes
  • Navigate to Form Templates. Select the 3 dots of your new Booking Control and select Edit
  • Enter a new form title. For example: Hair Salon Booking or Photography Session Booking
  • Add any additional Controls fields to your form using the add_link icon for example a Note Textbox.
Step 3: Adjust Business Hours & Other Settings
  • Click the content_paste icon and select Calendar Control and then Click the assignment icon to view the Controls Properties.
  • Set your working days and hours. Example:
    • Monday to Friday: 9:00 AM - 6:00 PM
    • Saturday: 10:00 AM - 4:00 PM
    • Sunday: Closed

Booking View

Viewing and Managing Appointments

Step 4: Access the Calendar

  • Navigate to Forms
  • Select the Booking Control Form. Click the Booking Form Tile to Add New Booking to schedule bookings yourself
  • Alternatively, Navigate to Forms, select the 3 dots and select link to copy a link to the Form you can provide to your customers directly or on your website so they can make their own bookings.
Step 5: Manage Appointment Requests
  • The Default Template comes with a Calendar Report on the Dashboard.
  • View all scheduled appointments for the day, week, or month.
  • Cancel Appointments delete the appointment from Forms by selecting the 3 dots and selecting Delete. Customers are able to delete their own bookings.

Booking Calendar

Tips for Maximizing Efficiency

  • Tailor forms for your industry: Use industry-specific language and required fields to make forms more relevant.
  • Analyze trends: Use analytics tools to identify peak booking times and adjust your availability accordingly.
  • Stay organized: Regularly update your calendar and settings to reflect changes in business hours or services.

Summary

By following these steps, you can efficiently manage appointments for any of the supported industries. The Appointment Manager’s flexibility and ease of use make it an essential tool for streamlining your booking process and enhancing customer satisfaction.